

Introduction
A few days ago (2026-08-05), Proxmox VE officially announced Arm64 support. That reminded me of the OrangePi 3B my lab seniors gave me, so I figured I would try booting Proxmox VE’s native ISO on it. The official images need to be booted via EFI, and after searching around I found that nobody had built UEFI firmware specifically for the OrangePi 3B, so I decided to compile it myself.
Environment
       _,met$$$$$gg.             nanami114@VM-Main
    ,g$$$$$$$$$$$$$$$P.          -----------------
  ,g$$P"        """Y$$.".        OS: Debian GNU/Linux 13.4 (trixie) x86_64
 ,$$P'              `$$$.        Host: KVM/QEMU (Standard PC (i440FX + PIIX, 1996) pc-i440fx-11.0)
',$$P       ,ggs.     `$$b:      Kernel: 6.12.74+deb13+1-amd64
`d$$'     ,$P"'   .    $$$       Uptime: 29 days, 3 hours, 15 mins
 $$P      d$'     ,    $$P       Packages: 3 (npm), 1526 (dpkg)
 $$:      $$.   -    ,d$$'       Shell: bash 5.2.37
 $$;      Y$b._   _,d$P'         Resolution: 1280x800
 Y$$.    `.`"Y$$$$P"'            Terminal: /dev/pts/1
 `$$b      "-.__                 CPU: Intel Xeon E5-2696 v4 (44) @ 2.1GHz
  `Y$$                           GPU: Vendor 1234 Device 1111
   `Y$$.                         Memory: 20.74 GiB / 31.33 GiB (66%)
     `$$b.                       Network: Unknown
       `Y$$b.                    BIOS: SeaBIOS 0.0 (04/01/2014)
          `"Y$b._
              `"""
Let’s Get Started
1. Building UEFI
1.1 Prerequisites
- There is a project on GitHub called quartz64_uefi that has ported UEFI to
RK356Xplatforms, so that is a good place to start. First, clone the repository
git clone https://github.com/jaredmcneill/quartz64_uefi- Looking at the project structure, it already ships a platform, device tree and drivers specifically for the OrangePi 3B, and
build.shincludes a build flow for it. So we can try building it directly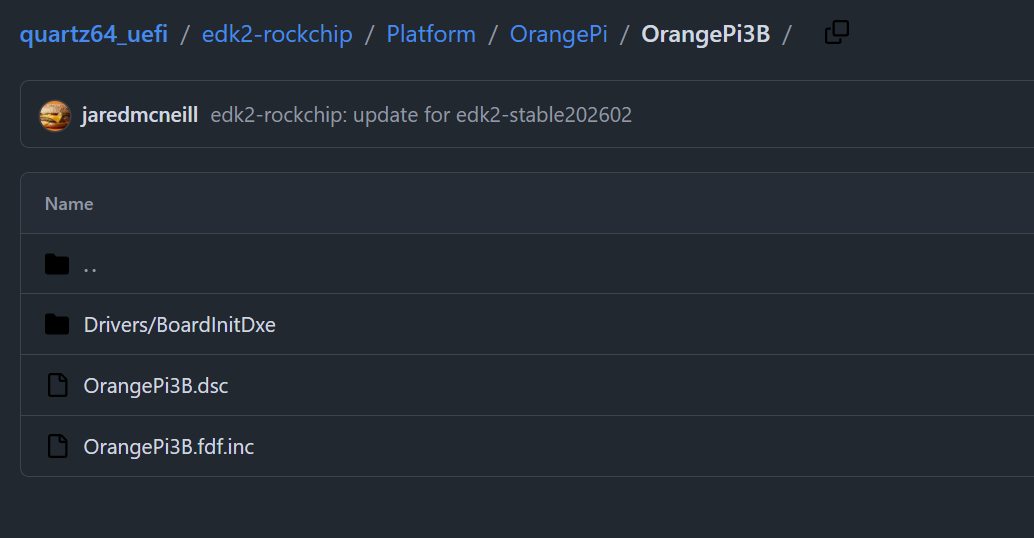
OrangePi 3B platform directory in the quartz64_uefi project
for board in ${RKUEFIBOARDS}; do
        case ${board} in
        QUARTZ64)
                build_uefi Pine64 Quartz64
                build_fit Quartz64 rk3566-quartz64-a
                ;;
        SOQUARTZ)
                build_uefi Pine64 SOQuartz
                build_fit SOQuartz rk3566-soquartz-cm4
                ;;
        ROC-RK3566-PC)
                build_uefi Firefly ROC-RK3566-PC
                build_fit ROC-RK3566-PC rk3566-roc-pc
                ;;
        ROC-RK3568-PC)
                build_uefi Firefly ROC-RK3568-PC
                build_fit ROC-RK3568-PC rk3568-firefly-roc-pc
                ;;
# OrangePi 3B Here...
        ORANGEPI3B)
                build_uefi OrangePi OrangePi3B
                build_fit OrangePi3B rk3566-orangepi-3b
                ;;
        PINETAB2)
                build_uefi Pine64 PineTab2
                build_fit PineTab2 rk3566-pinetab2
                ;;
        ZERO-3W)
                build_uefi Radxa Zero-3W
                build_fit Zero-3W rk3566-radxa-zero-3w
                ;;
        ODROID-M1S)
                build_uefi HardKernel Odroid-M1S
                build_fit Odroid-M1S rk3566-hardkernel-odroid-m1s
                ;;
        *)
                echo "Unknown board ${RKUEFIBOARDS}"
                exit 1
                ;;
        esac
done
1.2 Checking the Environment
- Check the Git submodule status
git submodule statusIf the owner of the current directory differs from the user running Git, Git will complain about dubious ownership. In that case, add it as a trusted directory
git config --global --add safe.directory path/to/quartz64_uefi- Check the toolchain
Because I’m building
arm64firmware on anamd64machine, I need a cross-compilation toolchain here. Let’s pull the dependency list out of the official CI config and install it
cat .github/workflows/build.ymlThat config lists everything the official build needs: gcc-aarch64-linux-gnu, iasl, device-tree-compiler, python3-pyelftools and uuid-dev. Install them directly
sudo apt-get update
sudo apt-get install -y --no-install-recommends gcc-aarch64-linux-gnu iasl device-tree-compiler python3-pyelftools uuid-dev- Check what
edk2-rockchipactually is
git -C ed2k-rockchip rev-parse HEAD
ls edk2-rockchip/.git
git ls-files | grep edk2-rockchip
After running these you’ll find that edk2-rockchip/ and edk2-rockchip-non-osi/rkbin/ are the platform code plus Rockchip’s official vendor components (DDR init firmware, BL31, OP-TEE, and the boot_merger/ddrbin_tool utilities). We need to confirm whether they are submodules or vendored straight into Git:
- There is no
.gitfile, andgit ls-filesshows234files tracked directly. So they are vendored into the main repository, and cloning it is all we need. - Only
edk2is a real submodule, so onlyedk2needs its own init.
1.3 Initialising the Build Environment
- Update and initialise all submodules
git submodule update --init --recursive
--recursivealso clones nested submodules, because edk2 itself contains test framework submodules such ascmocka/googletest/subhook- edk2 is a 200MB+ repository, so you’ll want a stable network connection for this step.
1.4 Trying the Build
- Start the build with make
make BOARDS=ORANGEPI3B uefiThis usually only takes a few minutes. If it takes far longer, check whether the earlier steps went wrong
- Once that finishes, use make to build an image you can flash to an SD card
make BOARDS=ORANGEPI3B sdcardThis requires
partedto be installed beforehand, otherwise it errors out
- When the build finishes you get an
ORANGEPI3B_EFI.imgfile that you can flash straight to an SD card and try booting.
2. Booting UEFI
2.1 Flashing
Use Win32DiskImager to write ORANGEPI3B_EFI.img to an SD card.
2.2 Booting
After rebooting you’ll see the Orange Pi logo and the tianocore banner. With no boot device inserted, it drops straight into the BIOS.
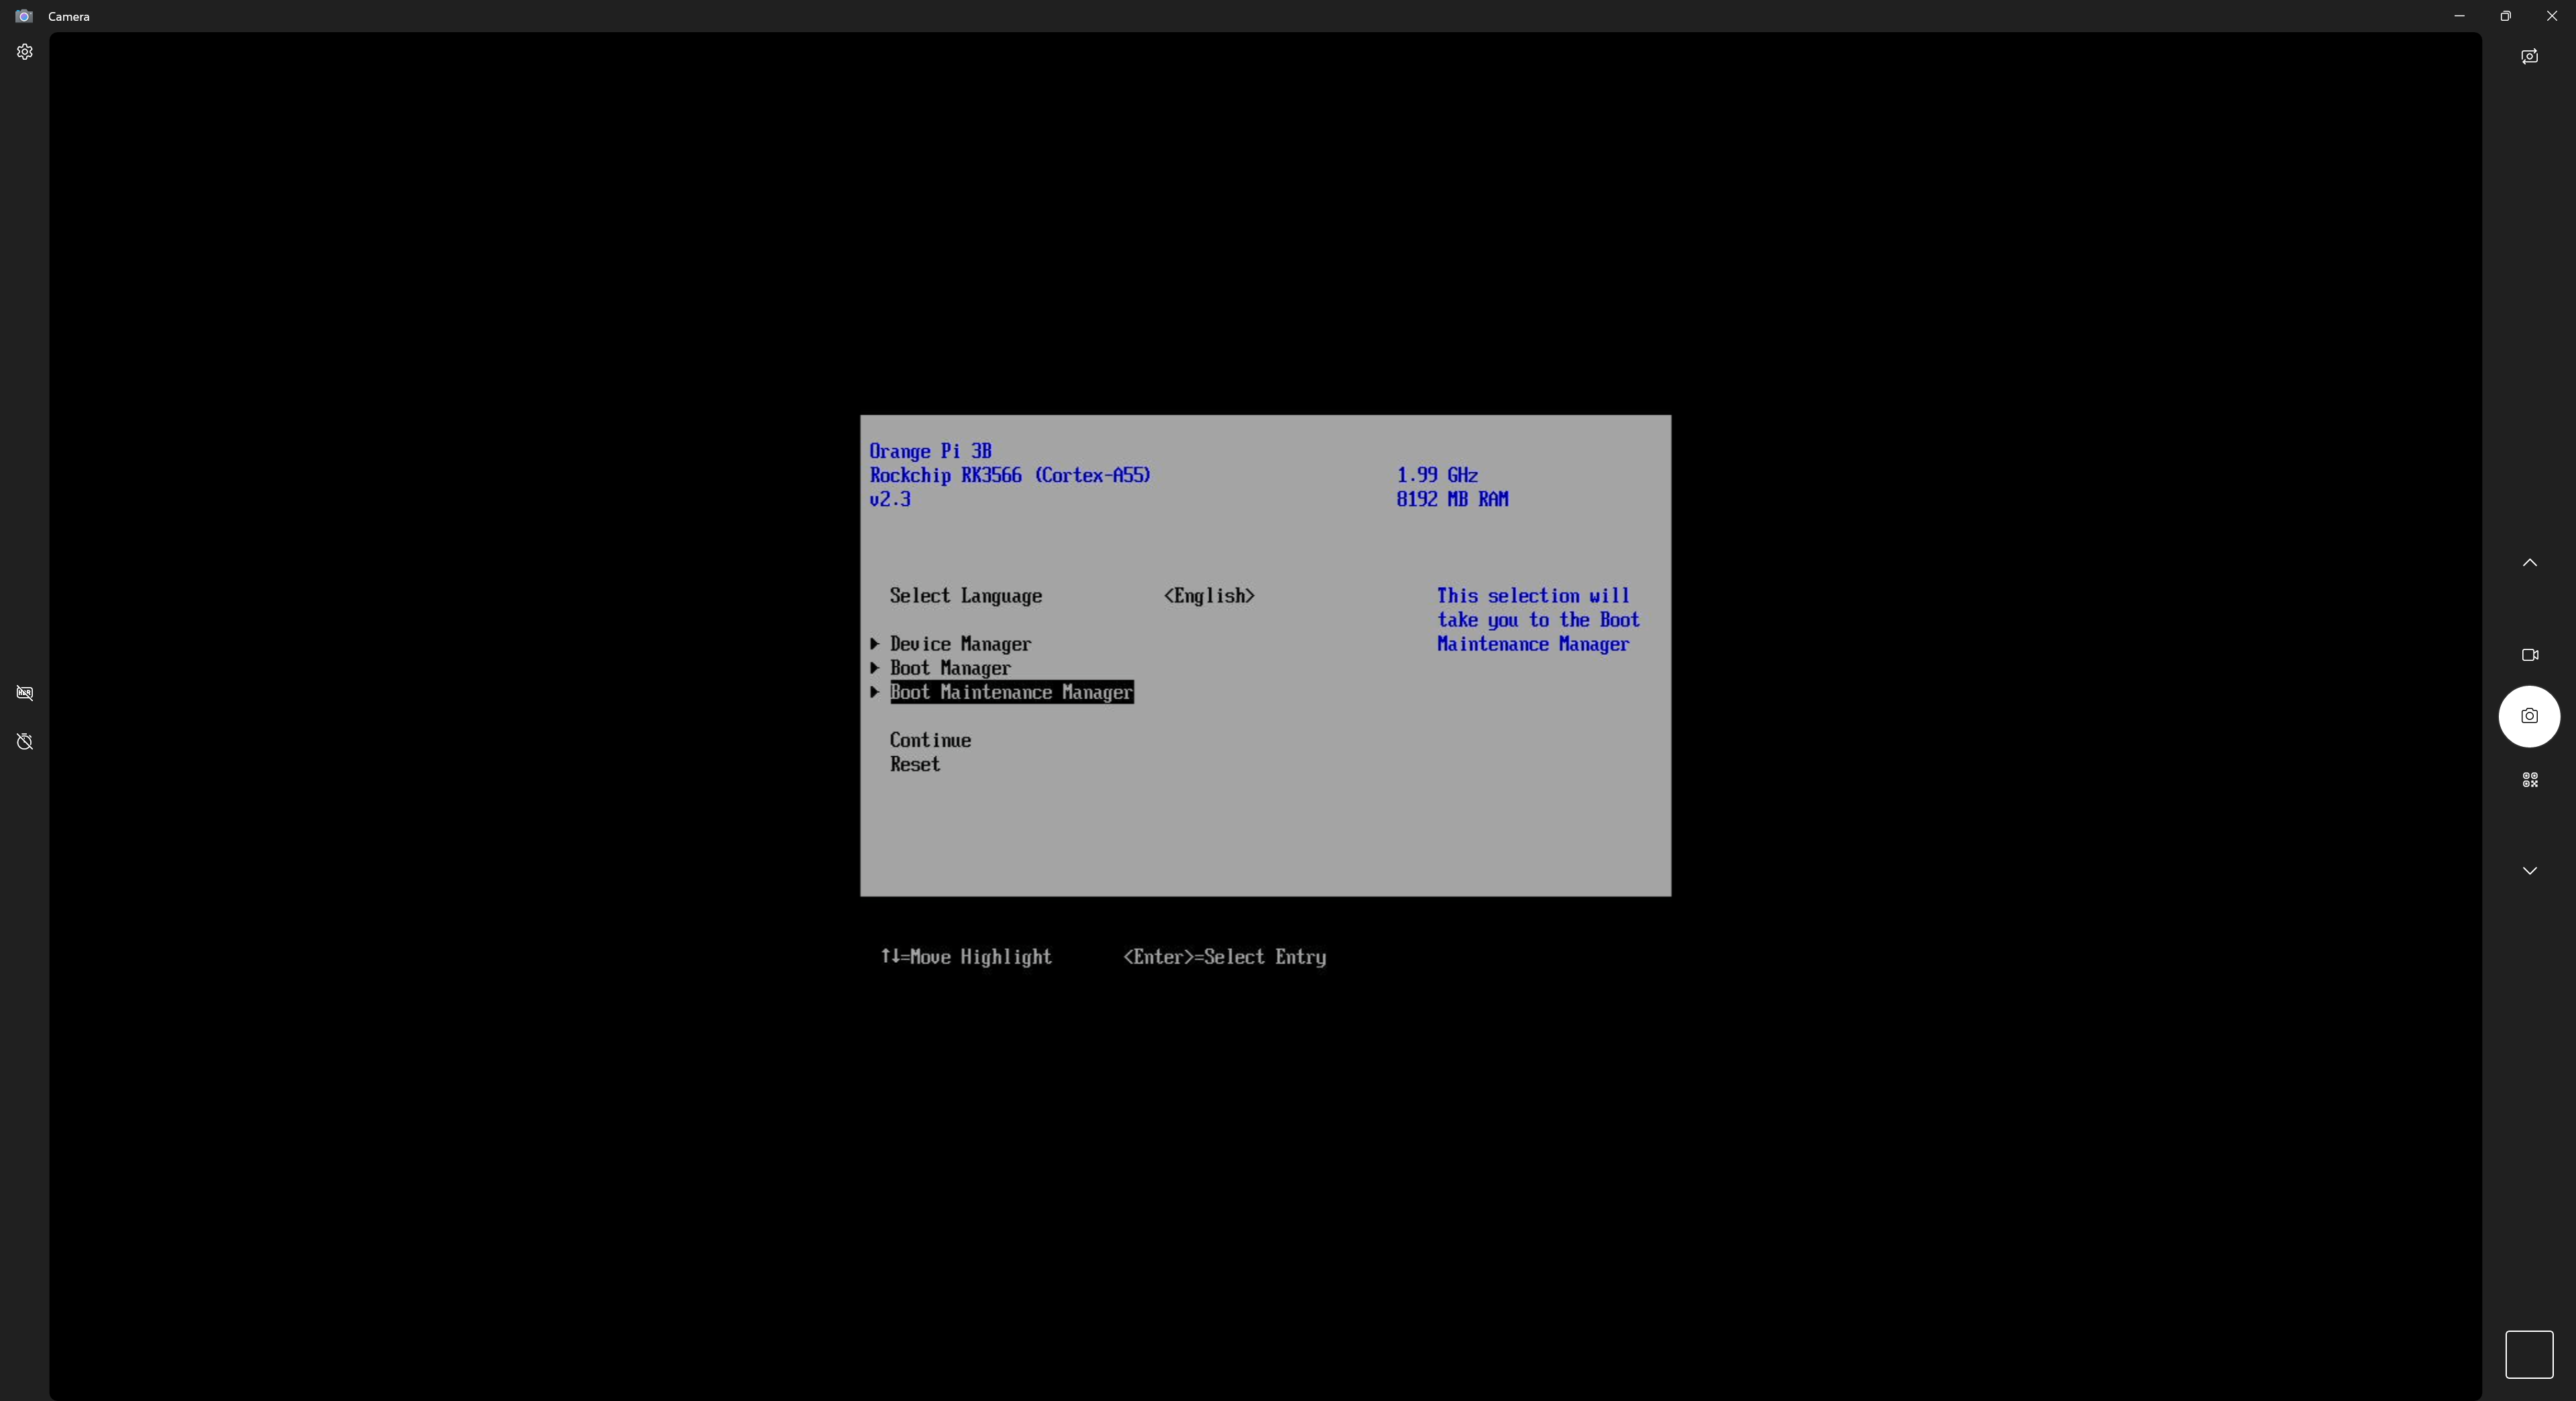
As far as I know, earlier builds only had USB 3.0 working. In the build I compiled here, all four USB-A ports work.
2.3 Flashing an OS
You can use something like UltraISO to write a bootable image to a USB drive and boot straight from it; UEFI will boot into your installation media automatically.

Conclusion
I’m not a professional, so please point out any mistakes or omissions. Thanks!
If you enjoyed this, leave a comment~