There are 7773 words in total,Reading takes about 32 minutes
Introduction
I have two broadband internet connections at home. If I only deploy network exit-related services on a single system, I can only use the upstream bandwidth of one connection at a time, which doesn't fully utilize both connections. Therefore, I decided to switch my network gateway sub-server to Proxmox VE. This way, I can use both broadband connections as network exits through firewall rules and load balancing, while also making server management more convenient. But how to migrate without losing the existing operating system and environment on the original server? This article will provide you with the best solution for full migration.
Requirements
External storage device >= server system disk data area
Server hard disk >= 64GB
Let's Get Started
1. Full Disk Data Backup
Install any Linux Live CD on the external storage device. SystemRescue is recommended here, or use Ventoy to integrate multiple ISOs
After entering the Live environment, list all disks
lsblk
Find your external storage device and mount it to the /mnt/usbdisk directory
mkdir /mnt/usbdisk
mount /dev/<device> /mnt/usbdisk
Proxmox VE requires configuring a Hosts entry for the current hostname that points to a non-loopback address:
The hostname of your machine must be resolvable to an IP address. This IP address must not be a loopback one like 127.0.0.1 but one that you and other hosts can connect to.
For example, if my server's internal network address is 192.168.1.5 and public network address is 112.32.***.***, the /etc/hosts configuration file should be as follows:
127.0.0.1       NanamiWork-SubServer
127.0.1.1       NanamiWork-SubServer.lan        NanamiWork-SubServer
192.168.1.5     NanamiWork-SubServer
112.32.***.***  NanamiWork-SubServer

# The following lines are desirable for IPv6 capable hosts
::1     NanamiWork-SubServer ip6-NanamiWork-SubServer ip6-loopback
ff02::1 ip6-allnodes
ff02::2 ip6-allrouters
If you don't want your server to be directly accessible from the public network, you can omit the public network information
Use uname -a to check system information. If the kernel version ends with -pve or similar, the installation is successful
Install Proxmox VE related packages
apt install proxmox-ve postfix open-iscsi chrony
During configuration, you will need to set up the postfix mail server. Official explanation: If you have a mail server on your network, you should configure postfix as a Satellite system. Your existing mail server will then act as a relay host, routing emails sent by Proxmox VE to their final recipients. If you don't know what to enter here, just select Local only and keep the system hostname unchanged.
After installation, you should be able to access the WebUI using https://<IP Addr>:8006. If you can access it successfully, the installation is complete.
Removing os-prober is not mandatory, but it's recommended by the official documentation because it may mistakenly recognize virtual machine boot files as multi-system boot files, causing unwanted entries in the boot list.
Proxmox VE installation is now complete
3. Create Virtual Bridge Network Card
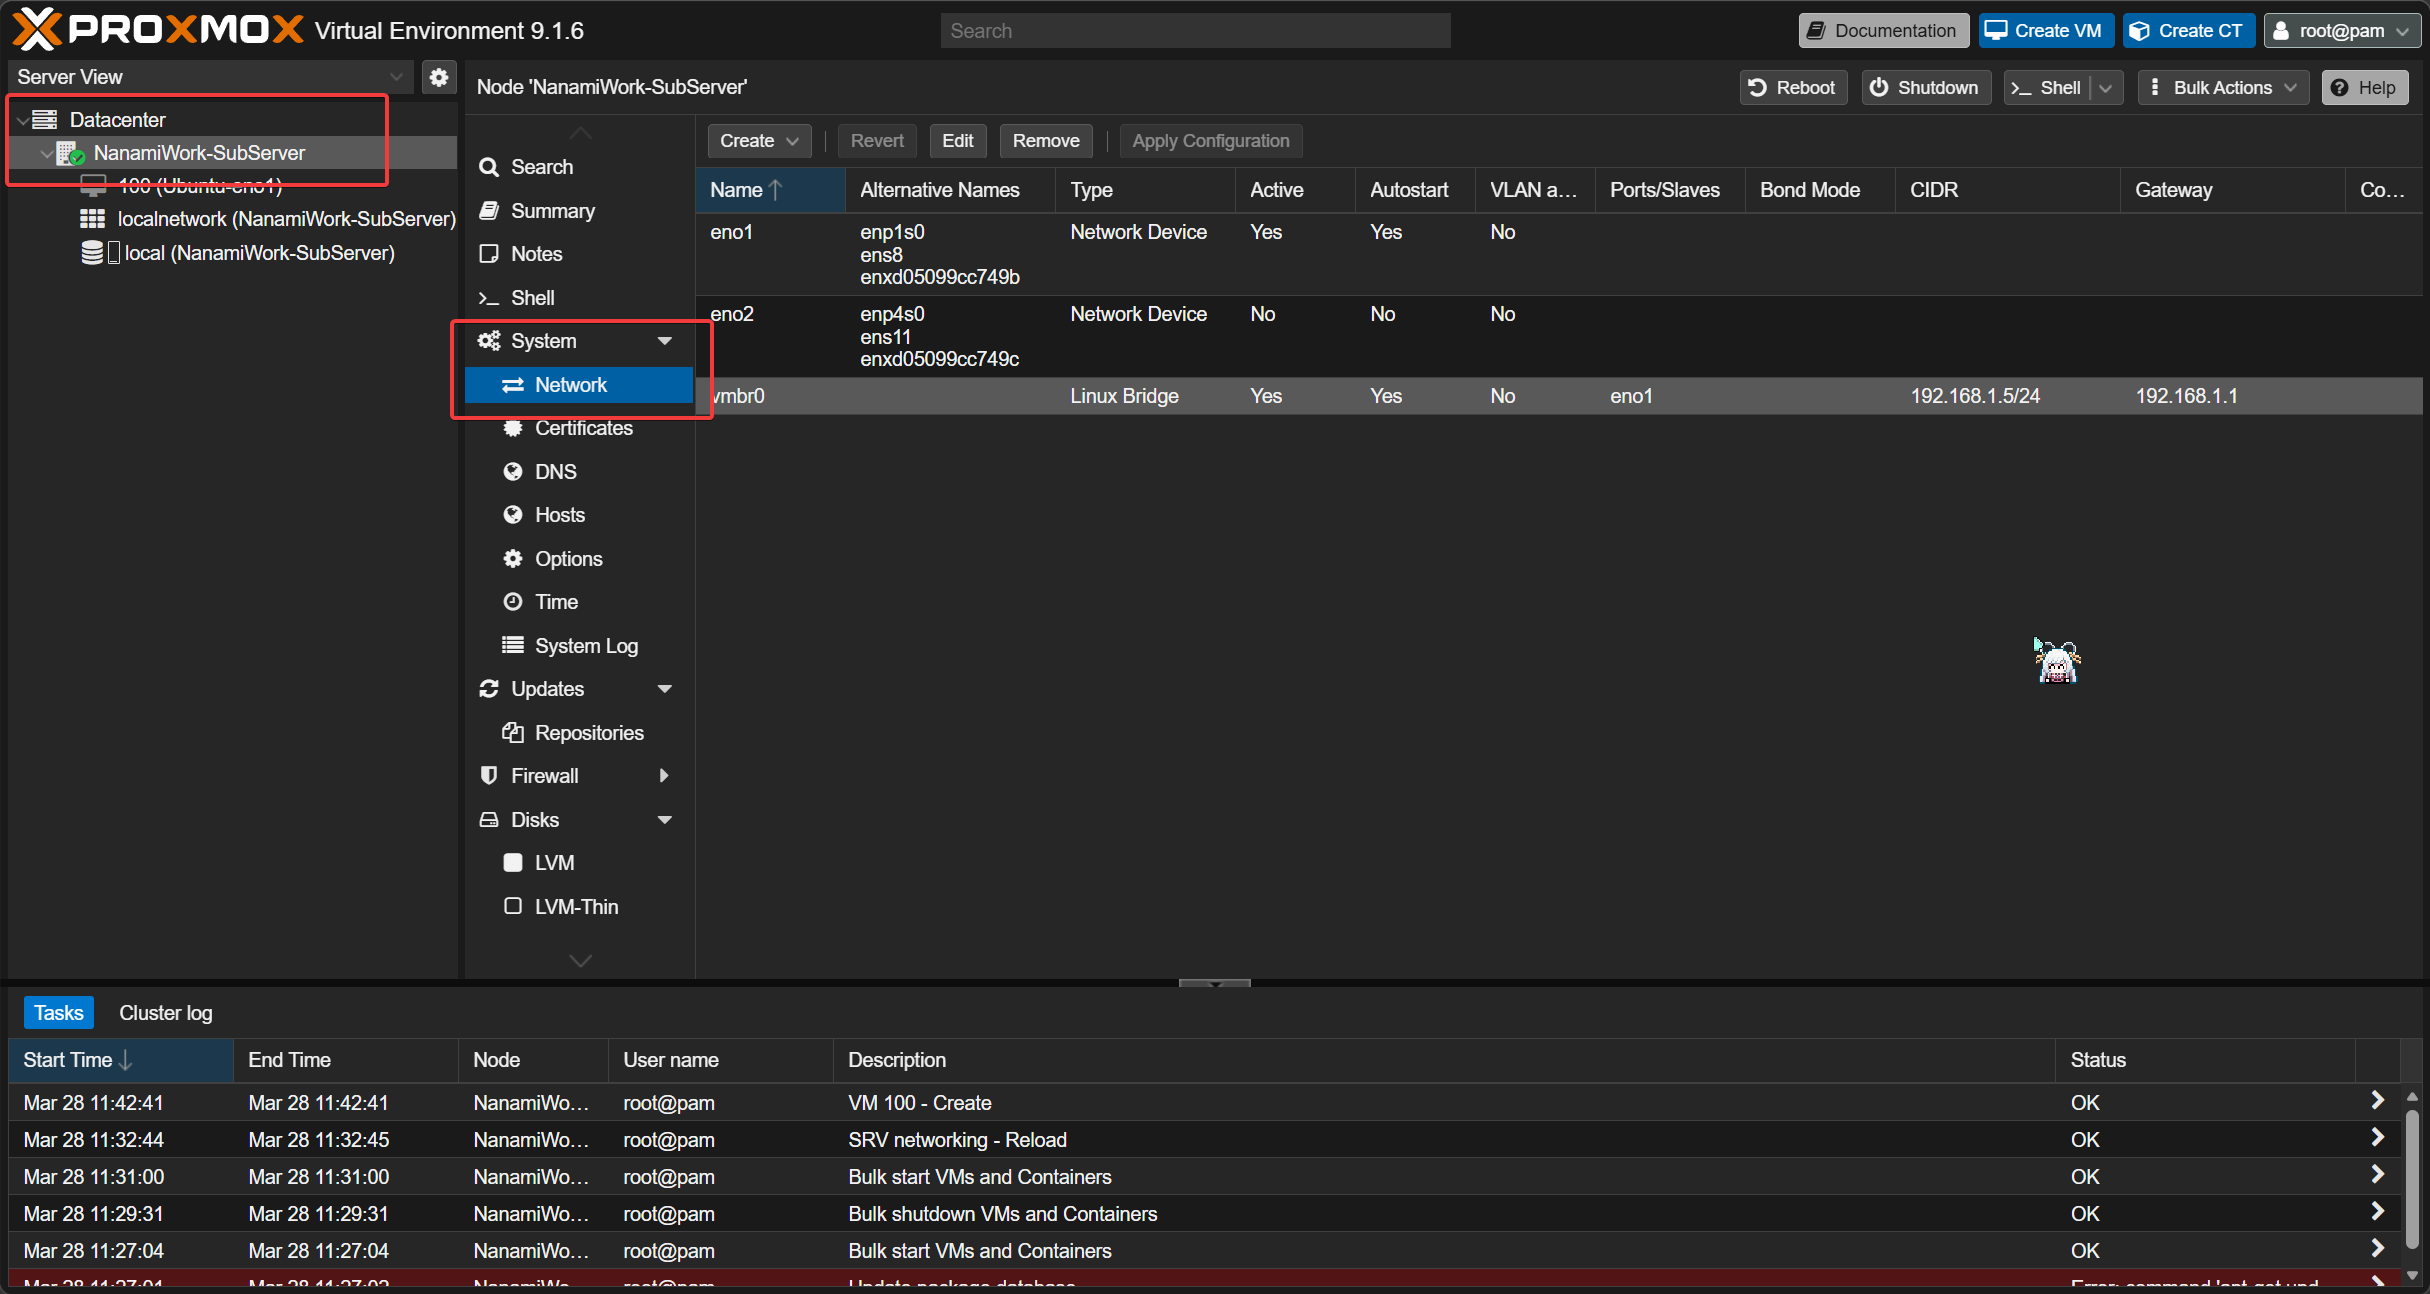
Log in to the Proxmox VE WebUI, navigate to Datacenter --> <Hostname> --> System --> Network tab
Network
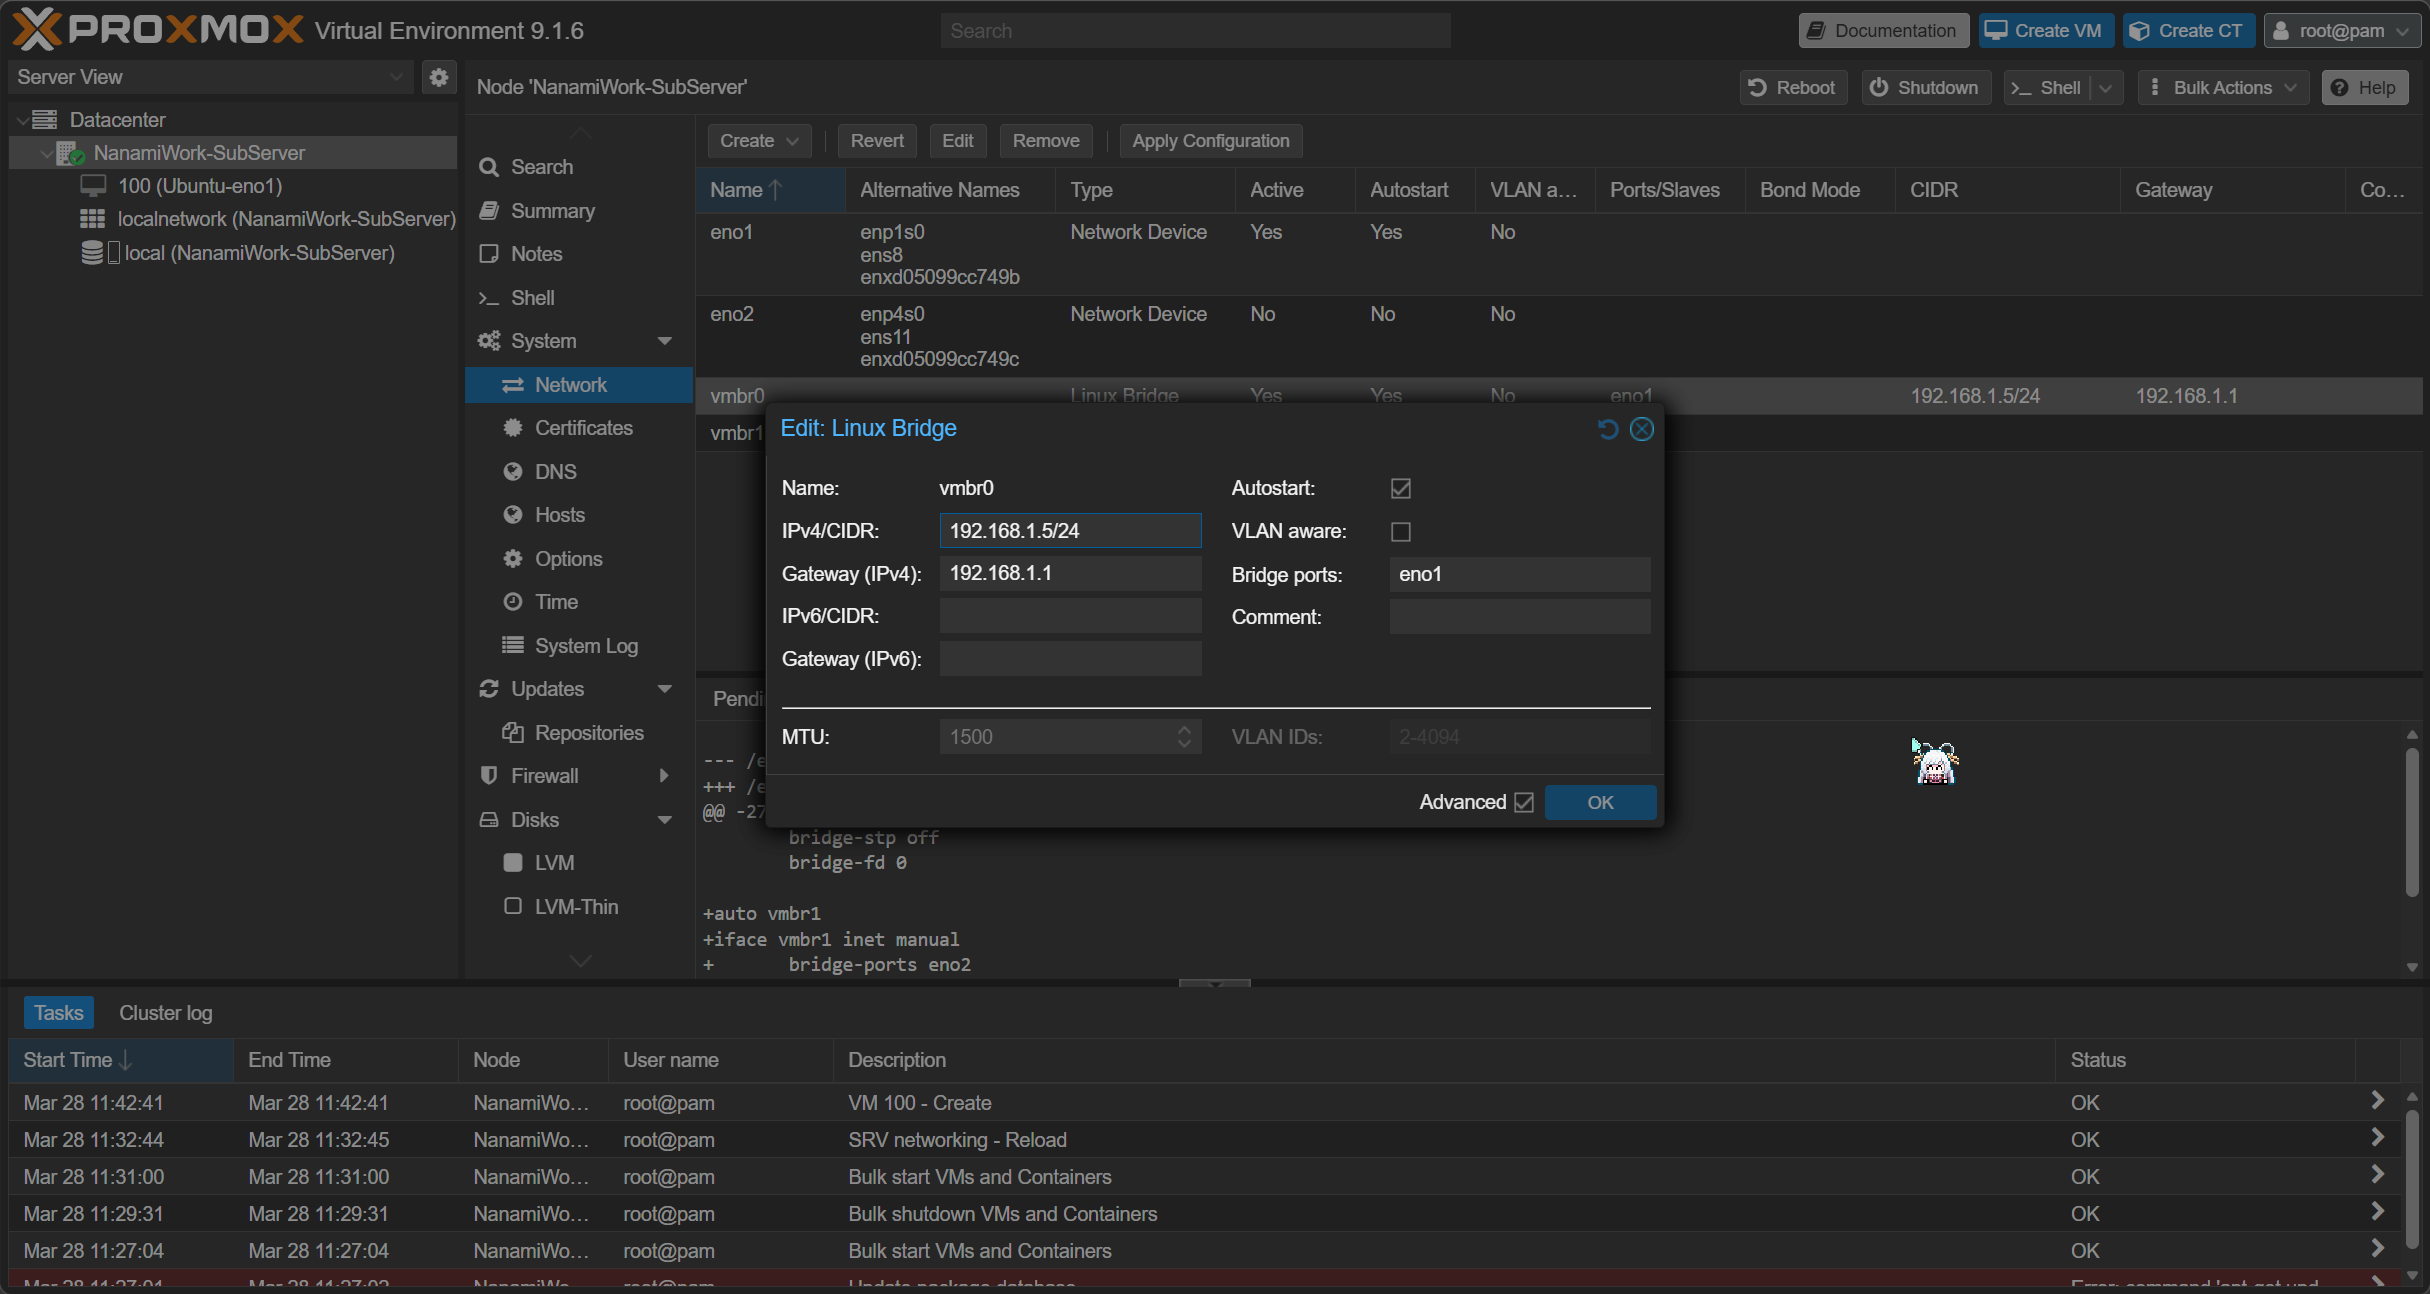
Click Create, select Linux Bridge
In the pop-up dialog, enter the Name you need, then enter the physical network card that this virtual network card will bridge to in Bridge ports
Note:
If you want to use this physical network card as the access card for the Debian physical machine system, you need to configure IPv4/CIDR, Gateway(IPv4), IPv6/CIDR(optional), Gateway(IPv6)(optional) in this dialog Example
Do not configure a fixed IP address for the server on the physical network card, otherwise it may cause a series of problems such as virtual machines being unable to connect to the network!!
Click OK to create the network card
4. Restore Original Server System
4.1 Create Virtual Machine
Log in to the Proxmox VE WebUI, click Create VM in the upper right corner, configure the virtual machine name, whether to start on boot, etc. as needed, then click Next
In the OS tab, select Do not use any media, then click Next
In the System tab, enable Qemu Agent, select whether to change the BIOS to OVMF (UEFI) as needed, then click Next
In the Disks tab, click the trash can icon next to scsi0 on the left to delete the default created disk, then click Next
In the CPU tab, change Type to host, then allocate cores (Cores) as needed. If there are many cores, you can enable NUMA, then click Next after configuration
In the Memory tab, allocate memory as needed, then click Next
Note: Memory allocation should not exceed 80% of physical memory, otherwise there is a risk of memory overflow
In the Network tab, select the virtual network card just created as needed, then click Next
Note: If your original system is Windows, you may need to change the network card model to Intel E1000 or Intel E1000E
In the final Confirm tab, confirm the configuration is correct and create directly. Wait for the status of VM 100 - Create in the Tasks at the bottom to become OK, then the virtual machine creation is complete
4.2 Restore Original Physical Machine Disk Image
Log in to the server via SSH, use this command to list all disks
lsblk
Find your external storage device and mount it to /mnt/usbdisk
mkdir /mnt/usbdisk
mount /dev/<device> /mnt/usbdisk
Copy the previously created qcow2 image file to the server